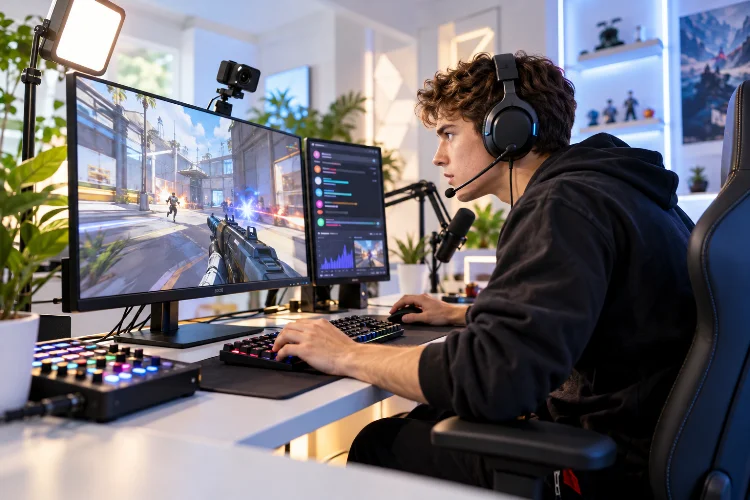
Imagine you’re playing Valorant during an intense ranked match. You land the perfect headshot, secure the final elimination, and celebrate an incredible victory. Unfortunately, your viewers don’t see that moment until several seconds later.
By the time their reactions appear in chat, you’ve already moved on to the next match.
For competitive gaming streamers, delays like these can make livestreams feel disconnected. They can also create confusion during interactive challenges, live coaching sessions, and esports commentary.
That’s why designing low-latency streaming workflows for competitive games is becoming increasingly important for creators who want responsive broadcasts without sacrificing gameplay performance.
However, reducing streaming delay isn’t as simple as choosing the lowest available latency setting.
Every stage of the broadcasting process matters, from game capture and video encoding to internet stability, platform processing, and viewer playback.
A poorly optimized configuration might reduce delay while introducing dropped frames, unstable video, or excessive CPU usage.
This guide explores how to build efficient livestreaming systems using practical hardware configurations, OBS optimization, network management, and performance monitoring.
The objective is simple: deliver smooth competitive gameplay while keeping your audience connected to the action.
1. Understand Where Streaming Latency Actually Comes From
Before changing your OBS settings or upgrading equipment, you need to understand what creates livestreaming delays.
Streaming latency is the time between an event happening during gameplay and that event appearing on a viewer’s screen.
That delay comes from multiple processing stages, not just your internet connection.
Break Down the Streaming Pipeline
A typical competitive gaming broadcast follows this sequence:
Game Rendering → Video Capture → Scene Composition → Encoding → Network Upload → Streaming Platform → Viewer Playback
Each stage introduces processing time.
The game renders frames, capture software collects them, and the encoder compresses the video into a format suitable for transmission.
The streaming platform then receives the encoded content, processes it as needed, and delivers it to viewers.
Finally, the viewer’s device buffers and decodes the video before displaying it.
Even if every individual stage adds only a small delay, those delays accumulate.
For example, a hypothetical setup might spend 20 milliseconds capturing and processing frames, 30 milliseconds encoding them, and another 100 milliseconds transporting data to the platform.
Those figures are illustrative, not typical benchmarks. Most end-to-end delay may still come from platform delivery and playback buffering rather than your local computer.
Separate Input Latency From Broadcast Latency
Competitive gamers should distinguish between two different performance problems.
Input latency describes the delay between pressing a button and seeing the resulting action on your own display.
Broadcast latency describes how long viewers wait to see that action.
These measurements are related through shared hardware resources, but they aren’t identical.
Reducing viewer delay won’t necessarily make your game more responsive.
Likewise, upgrading to a high-refresh-rate monitor doesn’t automatically improve the livestream’s delivery speed.
The best workflow protects gaming responsiveness while optimizing broadcast delivery seperately.
2. Build a Capture Workflow That Preserves Competitive Performance
Your capture configuration determines how efficiently gameplay moves into your broadcasting software.
For competitive titles featuring fast movement and demanding graphics, inefficient capture can create performance problems before encoding even begins.
Choose the Right Capture Method
OBS Studio provides several ways to capture gameplay, including Game Capture, Window Capture, and Display Capture.
On supported Windows configurations, Game Capture is often a practical starting point for competitive games because it captures the game directly rather than processing the entire desktop.
This can reduce unnecessary capture work, although actual compatibility and performance depend on the game and system.
Window Capture may be useful when Game Capture doesn’t work correctly.
Display Capture is another alternative, but it can capture unrelated desktop activity and may have different performance characteristics.
Test each method with your actual game rather than assuming one option performs identically everywhere.
Keep Scene Composition Lightweight
Streaming overlays can make a channel visually appealing, but they also consume system resources.
Animated backgrounds, multiple browser sources, unnecessary transitions, and high-resolution video elements increase rendering workloads.
For competitive gameplay, prioritize a simple scene containing the game, microphone audio, webcam if desired, and essential alerts.
OBS’s official encoding performance guidance recommends simplifying scenes when GPU overload causes rendering problems.
Avoid stacking multiple animated overlays simply because your equipment can technically display them.
The ideal setup keeps the gameplay clearly visible while leaving enough processing capacity for stable broadcasting.
Decide Between Single-PC and Dual-PC Streaming
A single-PC configuration handles gameplay, capture, and broadcasting on one machine.
This is generally simpler and less expensive, especially when using modern hardware encoders.
A dual-PC setup uses one computer for gaming and another for stream processing, usually connected through a capture card or supported network-based capture method.
Separating workloads can protect gaming performance, but it introduces additional equipment, cabling, synchronization, and troubleshooting requirements.
It also doesn’t automatically reduce end-to-end broadcast latency.
If you use a capture card, choose an appropriate low-latency passthrough configuration and continue playing from your gaming monitor rather than a delayed OBS preview.
For most creators, optimizing a single-PC setup is a sensible starting point before investing in a dedicated streaming machine.
3. Configure OBS Encoding for Low-Latency Gaming Broadcasts
Encoding converts raw gameplay into compressed video that streaming platforms can distribute efficiently.
This stage influences visual quality, CPU or GPU usage, and the consistency of frame delivery.
Poor settings can cause delayed processing, skipped frames, or unnecessary system load.
Choose Hardware Encoding When Appropriate
Modern GPUs frequently include dedicated hardware encoding capabilities.
Examples include NVIDIA NVENC, AMD hardware encoding, and Intel Quick Sync Video.
These technologies allow supported hardware to perform video compression without depending entirely on CPU-based software encoding.
NVIDIA’s official OBS broadcasting guide highlights the benefits of NVENC for reducing the performance impact of streaming.
For competitive gaming, this can be particularly useful because the game and streaming software are already competing for system resources.
However, hardware encoding doesn’t eliminate every performance concern.
OBS still needs sufficient GPU resources for scene composition, scaling, and other rendering tasks.
Match Resolution and Frame Rate to Your Resources
A common starting configuration for competitive streaming is 1080p at 60 frames per second.
This provides a balance between motion clarity and bandwidth requirements for many setups.
However, 1080p60 isn’t always the best choice.
If your upload connection is limited, 720p60 or a comparable lower-resolution format may provide more stable results.
For fast-moving esports titles, maintaining smooth motion can be more useful than increasing resolution while allowing frame delivery to become inconsistent.
Your gameplay might run at 144, 240, or even more frames per second while the broadcast outputs 60 FPS.
These settings serve different purposes.
Higher local frame rates support gaming responsiveness, while the streaming frame rate controls how many video frames your audience receives each second.
Configure Bitrate, Keyframes, and Encoder Presets
Bitrate determines how much data your compressed livestream sends each second.
Higher bitrates can preserve more visual detail, but they also require more reliable upload capacity.
For illustration, a 1080p60 stream using H.264 might begin testing around 4,500–6,000 Kbps on a compatible platform.
This isn’t a universal recommendation. Platform limits, codec selection, motion complexity, and the viewer’s available connection all affect the appropriate setting.
Use your platform’s current encoder recommendations as the final reference.
Many streaming workflows use a two-second keyframe interval when required or recommended by the destination platform.
Avoid changing encoder settings blindly in an attempt to save a few milliseconds.
Aggressive encoder presets, additional analysis features, and unsupported codec configurations can create more problems than they solve.
Start with reliable platform-supported settings, then test advanced adjustments individually.
4. Optimize Your Internet Connection and Streaming Network
A powerful streaming computer won’t compensate for an unstable internet connection.
Network reliability is especially important when broadcasting competitive gameplay because consistent frame delivery matters more than occasional bursts of maximum bandwidth.
Prioritize Upload Stability Over Maximum Speed
Internet service providers frequently advertise download speed, but livestreaming primarily depends on upload performance.
A connection advertising 100 Mbps download may still provide limited or inconsistent upload capacity.
Additionally, advertised upload speed doesn’t guarantee stable performance to a particular streaming ingest server.
Suppose your connection regularly supports 10 Mbps upstream.
Broadcasting at a full 10 Mbps would leave little room for other traffic or fluctuations.
A lower streaming bitrate, chosen with sufficient headroom and platform requirements in mind, generally provides a safer starting point.
Test the connection during the hours when you actually stream, not only during quiet periods.
Use Ethernet Whenever Possible
Wi-Fi offers convenience, but wireless networks are vulnerable to interference, congestion, and signal instability.
These fluctuations can affect livestream delivery even when average internet speed appears acceptable.
A wired Ethernet connection usually provides more predictable local networking conditions.
OBS recommends investigating wired connectivity when wireless instability contributes to dropped frames.
If Ethernet isn’t available, improve signal quality by reducing interference, avoiding congested channels, and maintaining a strong connection to the router.
However, a well-configured wireless network can still work for some broadcasting setups.
The important measurement is reliability under realistic streaming loads.
Understand Dropped Frames and Dynamic Bitrate
OBS defines network-related dropped frames as situations where the streaming connection cannot consistently maintain the required transmission rate.
This is different from frames missed during local rendering or encoding.
When network congestion occurs, lowering your streaming bitrate may improve stability.
OBS also offers a dynamic bitrate option that can reduce bitrate during connection problems.
This feature helps manage temporary congestion but doesn’t fix the underlying network issue.
For example, unstable routing, faulty equipment, or upstream congestion may continue affecting your broadcast.
Dynamic bitrate should be treated as a fallback rather than a substitute for diagnosing the connetion.
5. Use Platform Latency Settings Without Sacrificing Reliability
The streaming platform plays a major role in determining when viewers receive your content.
Different services use different delivery infrastructure, buffering policies, and latency options.
Consequently, OBS configuration alone cannot guarantee a particular end-to-end delay.
Configure Twitch Low Latency Mode
Twitch provides Low Latency mode to reduce the time between the broadcaster’s actions and viewer playback.
According to Twitch’s official documentation, this mode is enabled by default for most channels.
Creators can review the setting through the Creator Dashboard under Preferences and Stream.
Low Latency mode is useful for interactive gameplay sessions where viewers respond to decisions, predictions, or community challenges.
However, it doesn’t eliminate transmission and playback delays entirely.
The actual experience can vary depending on network conditions, device performance, and viewer connectivity.
Twitch also allows viewers to inspect latency information through the Video Stats option in supported players.
Use this information as part of your testing rather than assuming every viewer experiences identical timing.
Understand YouTube’s Three Latency Options
YouTube offers Normal, Low, and Ultra-low latency modes for eligible encoder-based livestreams.
These options represent different trade-offs between responsiveness, streaming features, and playback buffering.
| Mode | Intended Use | Official Guidance |
|---|---|---|
| Normal Latency | Less interactive broadcasts | Broad feature support and lower buffering risk |
| Low Latency | Moderate interaction | Most viewers experience under 10 seconds |
| Ultra-low Latency | Highly interactive livestreams | Most viewers experience under 5 seconds |
YouTube notes that lower-latency configurations can increase the likelihood of buffering.
Its Low and Ultra-low latency modes also don’t support 4K streaming.
The stated latency values describe expected experiences for most viewers, not guaranteed maximums.
For competitive streamers running live coaching sessions or interactive challenges, Ultra-low latency may be worth testing.
For broadcasts where visual quality and playback reliability matter more than instant interaction, a less aggressive mode may be preferable.
Consider Competitive Integrity and Stream Sniping
Not every competitive situation benefits from minimum broadcast delay.
Some multiplayer games allow opponents to gain an unfair advantage by watching a live player’s location, strategy, or team communication.
This behavior is commonly known as stream sniping.
During sensitive competitive matches or tournaments, an intentional stream delay may help reduce that risk.
Twitch provides options for adding broadcast delay, although eligibility and available settings can vary.
Check tournament regulations before deciding how much intentional delay to apply.
A slightly delayed stream that protects competitive integrity can be more valuable than a near-real-time broadcast that exposes private tactical information.
6. Measure End-to-End Latency and Diagnose Performance Problems
Optimization becomes much more effective when you can measure improvements.
Without testing, creators often confuse network instability, rendering overload, encoder limitations, and platform buffering.
These issues can produce similar symptoms while requiring completely different solutions.
Monitor OBS Performance Statistics
OBS includes a statistics window that displays important broadcasting performance indicators.
Open View → Stats to monitor relevant metrics.
Three categories are particularly useful:
- Frames Missed Due to Rendering Lag: Often associated with GPU or scene-composition overload.
- Skipped Frames Due to Encoding Lag: Indicates the encoding process cannot consistently keep up.
- Dropped Frames (Network): Suggests transmission problems between OBS and the streaming destination.
For example, if your game runs smoothly but OBS reports rendering lag, the scene or GPU workload may be too demanding.
Reducing overlay complexity or limiting the game’s frame rate might help.
If encoding lag increases, consider adjusting the encoder preset, resolution, frame rate, or competing workloads.
If network drops increase, investigate upload stability, routing, bitrate, and network equipment.
Diagnosing the correct bottleneck prevents unnecessary upgrades.
Perform a Real-World Latency Measurement
A practical testing method involves displaying a stopwatch or another changing timestamp in your captured scene.
Open the livestream on a separate device and compare the visible source timestamp with the delayed image appearing in the player.
For greater accuracy, record both clocks in the same camera shot and ensure your devices use a consistent time reference.
Repeat the measurment across several sessions.
Test during quiet gameplay, fast-paced matches, and periods of typical network activity.
Make sure the viewer device is playing near the live edge rather than several minutes behind.
If the viewer pauses or rewinds, that extra playback delay shouldn’t be attributed to your streaming configuration.
Test Audio and Video Synchronization
Low-latency workflows also require properly synchronized sound.
An audio mismatch can make gunshots, ability activations, or player reactions feel disconnected from the on-screen action.
Record a short test involving a visible action and an associated sound, then examine whether the events align.
OBS provides audio synchronization controls, but adjustments should be based on observed timing differences.
Avoid applying arbitrary offsets simply because another creator uses them.
Capture cards, audio interfaces, cameras, and software filters can introduce different delays depending on the setup.
A well-optimized stream should feel coherent, not merely fast.
7. Create a Repeatable Workflow for Reliable Competitive Streaming
Successful technical optimization isn’t a one-time configuration.
Game updates, driver changes, network conditions, and streaming platform features can all affect performance.
Building a repeatable testing routine helps maintain broadcast quality over time.
Prepare Your System Before Going Live
Begin by closing unnecessary background applications and checking that your intended scene collection is active.
Confirm the correct game capture source, microphone, encoder, output resolution, and streaming destination.
Review upload stability and make sure large downloads or cloud backups aren’t consuming significant bandwidth.
For important competitive sessions, conduct a short local recording or private test broadcast when available.
Replicate realistic gameplay rather than testing an empty desktop.
High-action scenes often stress the capture and encoding pipeline more heavily than a static game menu.
Establish a Performance Baseline
Choose a stable configuration and record its results before making further changes.
For example, a baseline might include 1080p60 video, hardware encoding, a platform-compatible bitrate, and a relatively simple OBS scene.
During several comparable sessions, record dropped-frame counts, rendering performance, viewer buffering complaints, and measured end-to-end delay.
Also track whether the game itself feels responsive.
A configuration with lower broadcast delay isn’t necessarily an improvement if it causes inconsistent game frame times.
The objective is achieving a consistant experience across both gaming and broadcasting.
Improve One Component at a Time
Once your baseline is stable, test individual changes.
You might compare two encoder presets, investigate a lower output resolution, or simplify a heavy browser overlay.
Avoid changing bitrate, resolution, codec, and latency mode simultaneously.
Multiple changes make it difficult to identify what actually improved performance.
For more advanced creators, OBS log files can provide useful diagnostic information.
OBS also provides an online Log Analyzer that highlights common configuration and performance problems.
Keep a record of successful settings so you can restore them after updates or unexpected issues.
Prioritize the Entire Viewer Experience
Lower latency is valuable because it improves how people experience livestreams.
Faster chat reactions can make coaching sessions, community challenges, and esports discussions feel more natural.
However, excessive buffering, unreadable gameplay, and unstable audio can undermine those benefits.
Your ideal workflow should balance responsiveness, motion clarity, reliable delivery, and competitive gaming performance.
Sometimes a slightly higher delay with smooth playback produces a much better experience than the absolute lowest possible latency.
Technical performance should support your content, not become a distraction from it.
Designing efficient gaming livestreams requires understanding the entire broadcasting pipeline rather than focusing on a single OBS setting.
Capture efficiency, hardware encoding, frame rate selection, upload stability, and platform buffering all influence how quickly viewers experience your gameplay.
The best configurations also protect gaming responsiveness, especially during demanding competitive matches.
Start with a simple capture scene, a reliable hardware encoder, a stable wired connection, and the latency mode appropriate for your audience. Then use OBS statistics and real-world playback tests to identify opportunities for improvement.
Most importantly, prioritize consistent performance over impressive technical specifications.
Review your current streaming setup, measure your actual delay, and test one improvement during your next broadcast. Small, evidence-based adjustments can create a smoother, more responsive experience that keeps your viewers connected to every competitive moment.